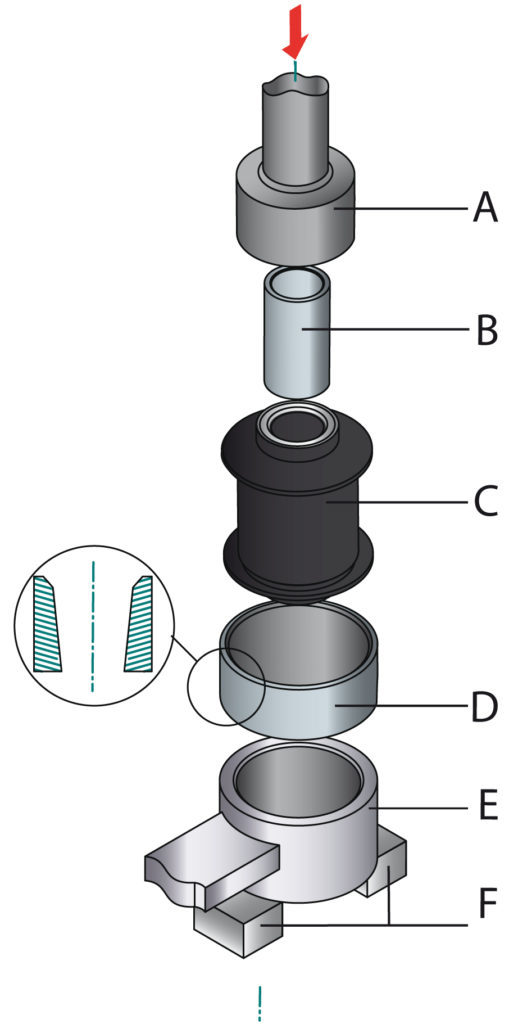
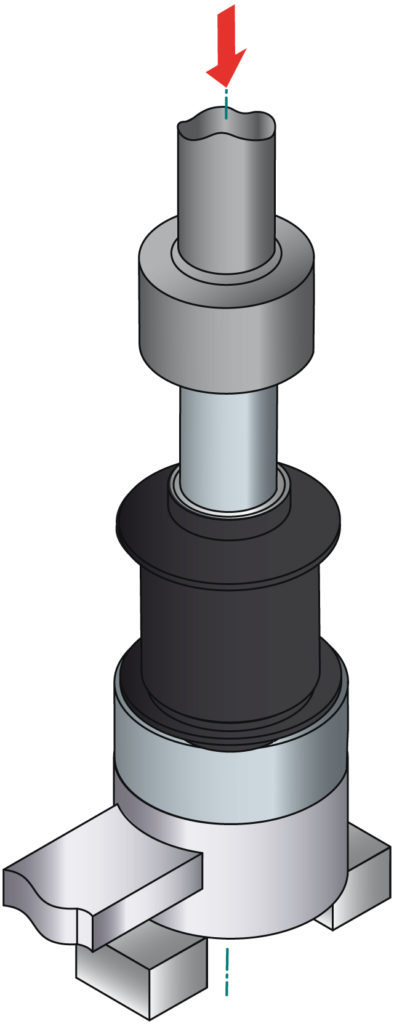
Below we present the correct methods of installing the metal-rubber bushings:
1
2

3
4
5
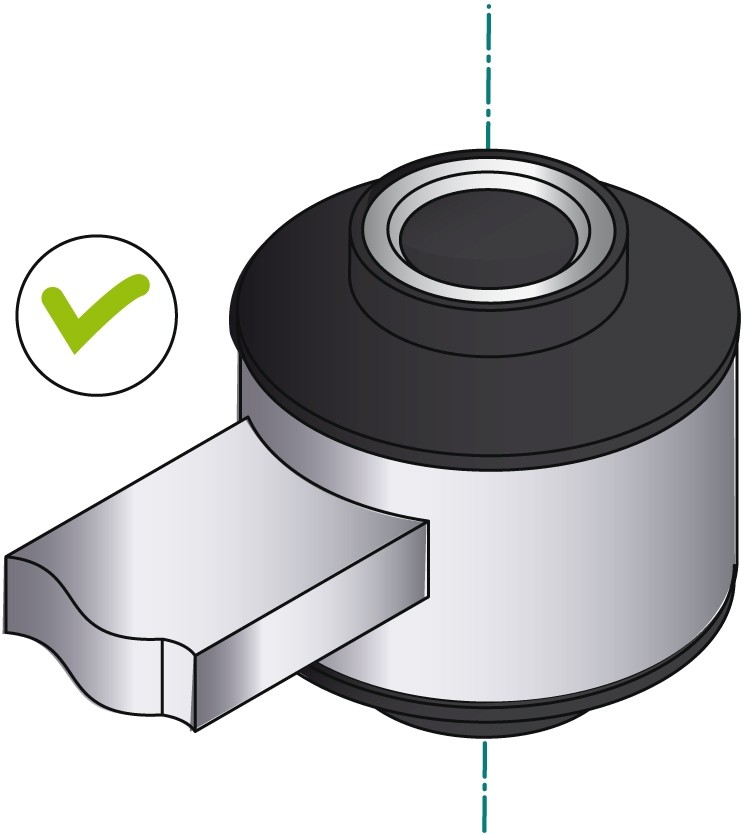

Lubricate the indicated surfaces with grease

Do not use the hammer for assembly, as the element will be damaged
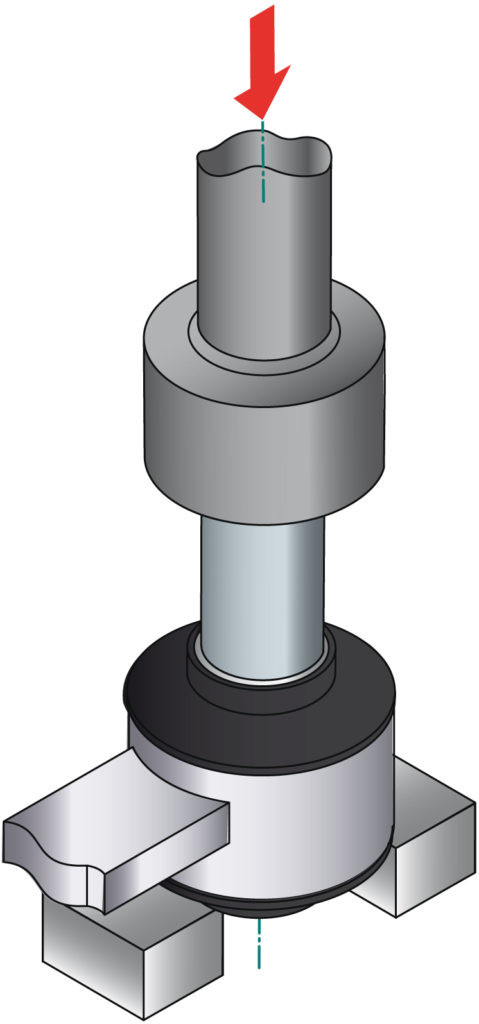
A – Press piston
B – Auxiliary sleeve
C – Metal-rubber bushing
D – Conical sleeve
E – Swingarm socket
F – Support