Replacement of insert in center support bearing in Chrysler PT Cruiser (Manual #8)

The TEDGUM® company advises how easy it is to replace the support on the propshaft when the shaft is not removable according to car manufacturer, for example in Chrysler PT Cruiser. In many cases, the service refuses to replace this particular component, but can only offer replacement of the entire axle shaft.

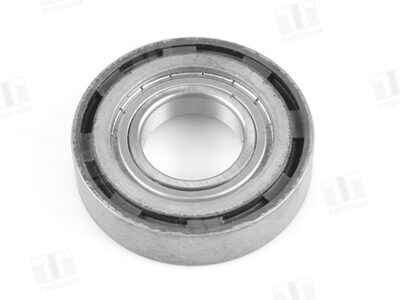
00138726 - Wkład z łożyskiem do podpory półosi (Chrysler PT-Cruiser) -zdjęcie
00138726 – Insert with bearing for axle shaft (Chrysler PT-Cruiser)

The exact replacement process is as follows:

1

Prior to disassembly, make the marks on the inner shaft, the longest shaft and the housing of a joint.

2

Dismantling of the part of the axle shaft, on which there is a support with a bearing, from the part of the axle shaft with a joint. To achieve this, remove the clamp and slide off the rubber cover of the joint.

3

Dismantling the joint housing from the drive shaft on the press to allow access to the drive shaft support. The place of support is the lower surface of the joint housing, and the pressure is the upper surface of the driveshaft.

4

Pressing the axle shaft support out the drive shaft. Before disassembly, remove the securing ring located at the support bearing. The place of support is the housing of the support and the place of pressure is the upper surface of the shaft.

5

Then, on the lathe, remove the used rubber along with the bearing to allow a new TEDGUM® insert to be pressed in.

6

A new TEDGUM® insert is pressed in. The place of support is the housing of the support and the place of pressure is the upper surface of the insert. CAUTION! do not apply pressure to the bearing.

7

Correctly pressed insert. Make sure that the upper surface of the insert, after pressing, is aligned with the support housing.

8

Pressing the support onto the axle shaft with an intermediate sleeve. The pressure point is the upper surface of the inner bearing ring and the lower surface of the driveshaft for support.

9

Location of the securing ring.

10

Pressing the pivot housing onto the pivot shaft. The distance between the top surface of the support and the straight surface of the bottom of the joint housing should be 110mm. The pressure point is on the inside bottom surface of the pivot housing, and the bearing point is on the bottom surface of the pivot shaft.

11

Before assembling the axle shaft parts, place the previously cleaned gasket on the joint housing and fill it with gear oil dedicated to this type of assembly.

12

Connect the joint parts, paying attention to the previously marked features. Installation of the clamp.

13

Correctly assembled axle shaft.

Manual shown above is just a presentation showing how the repair procedure can be made. TEDGUM® company does not bear responsibility for any errors in the manual and incorrect interpretation of the manual. Repair should be preceded by skilled personnel with the use of appropriate tools and with keeping all the safety means. All rights reserved.

Share on facebook
Share on twitter
Share on linkedin
Share on email

More in this category

Do you want to be informed? Subscribe to our newsletter !

We would like the use of our website to be comfortable for all users. This is possible thanks to the storage of cookies in the user’s browser and the processing of anonymous data for statistical purposes by TEDGUM Tadeusz Wojciechowski, based in Ruda Śląska 41-708, ul. Zabrzańska 22 and its Trusted Partners. Our Privacy Policy contains all information regarding the method and scope of data processing. The user may at any time ask for sharing and changing the data stored by the website administrator.